Search This Blog

Friday, 29 October 2010

How to use a compressor

This article is taken from my website, which may be of interest if you're looking for PA Hire.


Compression is an essential tool in modern sound engineering. Most commercial recordings will have compression on just about every instrument. In the world of live sound, many amateurs do not correctly understand the best use for compression.
Compression should be used in the first instance to help achieve a sound without harsh or unexpected peaks that cut though and ‘grate’ on ones ears. The human ear is actually more sensitive to these mid-range frequencies. The main culprit here are vocals. This is because vocals have a lot of mid-range frequency content, and because singers (even good singers) often unintentionally vary the distance from their mouth to the microphone, effectively giving their voice even greater dynamic range.
Adding compression limits the dynamic range, evens out the small variation in microphone position, and provides a smoother sound for the audience. You can achieve a similar effect by ‘riding’ the fader on the vocals and listening, but it’s pretty hard work, and the singer can catch you out.

suggested settings for vocal compression:

  • Ratio 3.5:1
  • Adjust threshold so the gain reduction is showing 3-9 dB during singing.
  • Adjust the limiter so it cuts in only on the peaks, if at all.

suggested settings for tie clip mic:

  • Ratio 8:1
  • Adjust threshold so the gain reduction is showing 3dB or less during talking
  • Adjust the limiter so it cuts in when the gain reduction gets to 9dB (un-clip the mic and move it closer to your mouth to do this)

suggested settings for bass guitar, or electric guitar:

  • Ratio 2.5:1
  • Adjust threshold so the gain reduction is showing 3-6dB during playing

suggested settings for acoustic guitar:

  • Ratio 4:1
  • Adjust threshold so the gain reduction is showing 3-6dB during playing
  • Set the limiter to cut in when the gain reduction gets to 9dB

It’s important to remember that using a compressor on an insert will affect the signal sent to the monitors as well. Too much vocal compression may be annoying for an experienced vocalist who expects the monitor to get louder as they approach the mic. Although, in the case of an experienced vocalist, less compression (lower ratio) is normally needed to reign in the sound!
Use of the attack and release controls can change the way the compression behaves. It takes a while to become familiar with the effect of the controls, and with what works and what doesn’t. In most cases, a fairly fast attack and a medium or slow release is the way to go. We would suggest you leave your compressor set on auto if it has this feature, and if not, leave the controls at 12 o’clock!!
Compressors can be used for a variety of other applications, even across a whole mix. This can have un predictable effects – in general it’s best to restrict the use of compression to a few key channels, unless you really know what you’re doing!

Tuesday, 26 October 2010

How to Prevent Feedback in a PA System

The article below is reproduced from my website, you can find it here:- www.soundtruth.co.uk/soundbasics.shtml
We get asked this all the time, and we're afraid that there is no very short answer (other than “turn it down!”). However, there are steps that can be taken to greatly reduce the risk of feedback. Reduce the risk almost to zero in some circumstances.
  • Reduce on stage volumes where possible - then you can reduce monitor gain and hence reduce the possibility of feedback. Prime culprits here are on stage bass guitar amps, and drums... drums being more of a challange to 'turn down'!
  • Encourage vocalist to sing really close up to the mic. Not all singers are used to, or like this technique, but from a monitor engineers point of view it works best! A good singer can still pull the mic away a bit for louder syables, words or sections. This tip is especially hand for vocalists that are asking for more in the monitors than you can give them without feedback.
  • Eliminate simple causes of feedback – for example a guitar or bass left plugged in, turned up and on a stand. Inexperienced musicians are prone to doing this and need to be educated!
  • Make sure your FOH speakers are positioned not to bleed into the microphones.
  • Be aware of the pickup pattern of your microphones, and use this to your advantage. Most mics are cardiod, and so are pretty directional. Make sure they are not pointing at monitors or front of house speakers.
  • Don’t put unnecessary mics such as the drum overhead into the monitor system.
  • Don't use more mics on stage than nessasary. Every time you double the number of mics on stage, you reduce the gain before feedback by 3dB (the system will start to feed back at a perceieved volume about 30% lower than before).
  • Use good quality microphones. If you’ve ever used a really cheap mic, you will know how prone they are to feedback and handling noise. Having said this, many people won't find much difference between an £80 microphone and a £350 microphone. Just avoid the cheapo £20 mics and you should be OK.
Shure SM58 Mic, a good industry standard vocal microphone


  • Use good quality monitor speakers. Many venues try to save money and buy cheap monitors for the band – this is a shortcut to feedback problems, and a poor stage sound.
  • Use good quality FOH speakers. Poor quality FOH speakers can also give feedback problems due to comb filtering and un-even frequency response.
  • Hearing loop systems can cause feedback, especially into electric guitar pickups. Solve the problem by removing the guitar from the loop mix, or reducing the loop mix level.
  • Follow a standard sound-check procedure (for an example, read running a soundcheck) and make sure to do the FACE / FLAT HAND / CUPPED HAND test, with all the mics ON, both in the monitors and FOH.
  • Listen to the feedback and identify the frequency. This can be done with skill – or when an audience is not there, you can ‘sweep’ the mid band EQ and ‘find’ the offending frequency. Cut the frequency by 3dB and the feedback problem will reduce. More cut can be used in some cases, but will of course start to influence the sound of the mic. Low frequency feedback (for example from a tie clip mic), can be reduced by cutting the bass. LF feedback from a kick drum or toms is normally countered using a gate.
  • Use a graphic EQ on either the FOH or relevant monitor mix to cut the offending frequency. Some engineers ‘ring out’ a monitor or FOH rig prior to a show. This can result in up to 6dB more gain before feedback. However, the monitors can end up sounding rather dull, as one normally ends up with quite a bit of upper mid-range cut on the EQ (The bands on a normal EQ are not really narrow enough, and end up cutting more frequencies than are required).
  • Use a feedback destroyer. In some ways a last resort… the cheaper f/b destroyers such as Behringer can have problems with noise levels. Sabine make better but more expensive models. They use very fine notch filters to cut feedback frequencies and need the system to be ‘rung out’ prior to use in order to work at their best. They should give about another 6dB gain before feedback, without the side effects of graphic EQ or channel EQ.

Tuesday, 19 October 2010

World's largest photo album- PA System

Last week we supplied a PA System for the Worlds largest photo album.  The record was atempted by Photobox at the Old Truman Brewery in London's Brick Lane.

Worlds largest photo album

Sound coverage was needed for background music, and various anouncments for up to 300 people.  We supplied and installed a pair of Yamaha MSR400 powered speakers, together with a Soundraft E6 mixer and a Sennheiser EW100 series hand held radio microphone.
The photo's on display were superb, and many of them were taken by amature photographers around the UK. The subject was World travel.

The Yamaha speakers were partly conceled behind the pillars


Wednesday, 13 October 2010

What is loud? Why do I need to know about dB SPL?

Perception of loudness is a complicated subject. Every person will perceive loudness differently, as everyone’s ears are different. In fact, everyone’s ears have a slightly different frequency response.

This is why, in sound engineering circles, there is a need to quantify sound pressure levels to define what is loud, and what is quiet. Or perhaps that should be; what is too loud and what is too quiet. The unit of measurement is the dB SPL (decibel). There are also more accurate measurements of loudness called phons, and subjective loudness, called sones, but these are rarely used and are outside the scope of this course!

For convenience we normally measure dB SPL from the mix position, but it can be useful to measure from other areas such as the front row and the stage.

For those new to dB SPL here is an idea of how different sounds compare in level:-
Recording studio30dB SPL
Conversational speech60dB SPL
Noisy office80dB SPL
Church concert (contempory worship)95dB SPL
Loud rock concert, front row120dB SPL
Threshold of pain, average young person130dB SPL
Concord take-off from runway side140dB SPL
.357 Magnum handgun, (peak impulse)165dB SPL
Under a Saturn 5 Rocket on take-off!194dB SPL

This article was taken from my web site, you can read more about PA Hire and dB SPL here.

Monday, 11 October 2010

Analog vs Digital mixing desks

Firstly, I should say that everything I say here is purely my own opinion ;-) This is a debate that's been running for some time in the live sound and PA Hire world... the relative benefits of analog and digital mixing consoles.
Analog offers familiarity and ease of use, having been around since the dawn of sound re-enforcement, it's what most engineers will have learned their trade on.  Digital offers a brave new world of layers, built in effects and dynamics, and work flows that are completely different to the traditional analog cousins.

Digital has come on in leaps and bounds in recent years.  Interfaces have improved, sample rates improved along with sound quality.  Prices have come down a bit.  Progress in the analog world has been slower, with few manufacturers putting in much R&D into this area any more.

It appears to me that if you've got decent money to spend on a desk (like, over £7000), then digital appears to be the favourite option.  Analog desks in this price bracket tend to be vast and incredibly heavy devices, sometimes needing up to six people to lift them onto a stand. They need a big rack of outboard with them to compete in any sense with a digital board.  Digital desks are for the most part much lighter and easier to handle. They have all the outboard built in, so that's another rack that can be left behind.  Most people agree that the sound of digital desks holds up pretty well too.

The difficult comes when you're spending less money, as the choice of digital desks tends to dry up a bit under £7,000 or $10,000.  You are left with a few 16 or 12 channel offerings like the smaller Yamaha LS9-16 or the O1V-96.  There's a few left field offerings like the Presonus Studiolive as well, but their unusual interface could be perceived as a little bit rider-unfriendly.  If you need 32 channels, as many live sound engineers will, you're a bit stuck.

In the analog realm however there are a good few well respected desks in this price bracket, such as the Allen & Health ML and GL series, and the Soundcraft GB and MH series.  Some of their larger offerings are still pretty heavy, and you do have to wonder how their values will hold up with digital boards getting cheaper.

So perhaps the best decition is to wait untill the prices of digital mixing desks has dropped, and hire a mixing desk should you need one in the meantime!

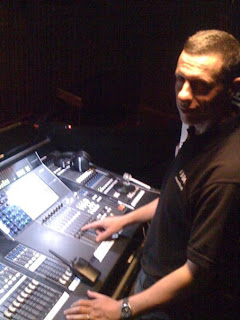
Me operating a Yamaha M7CL digital desk

Saturday, 9 October 2010

Conference PA systems

Yesterday I supplied a small PA system to a conference suite at the MK Dons stadium Hilton in Milton Keynes.  The client needed to project his voice to the back of a large room full of people, without straining his voice.  We used a headset radio mic (Sennheiser EW300 series), connected to a Soundcraft E6 mixer.  Speakers were Yamaha MSR100 powered speakers.
The Yamaha MSR100s are very compact size but produce a remarkable sound quality and volume for a small box.  We had custom covers made for ours as they don't come with a cover.
I was impressed by the size of the stadium and the facilities on offer!

Yamaha MSR100 speakers, great for small conference events

The MK Dons Stadium in Milton Keynes

Thursday, 7 October 2010

Subs up for more bass

Getting a good kick drum sound on a gig many engineers would agree, is a factor of how good your subs are.  A pair of 15in drivers is not really going to cut it unless it's a really small gig.  Horn loaded 15s or band pass 15s maybe!  A key fact to consider is this:- to double the perceived volume you'll need to need to more than double the power.  In fact, you'll need around 10 times the power to double the volume (a 10dB increase).  So that's like going from your 1KW system to a 10KW system.
But there is another way... doubling the number of subs will generally increase  your bass output by 6dB.  So let's say you take your 1KW rig, and instead of 1 15 inch sub each side, you put 4 15inch subs each side.  You will have more than doubled the bass output.  For the same power!  I'm assuming your amp will cope here, by the way... It may be asking a lot to go from an 8ohm load per side to a 2ohm load per side with 4 cabs a side connected.  I've blown amps up using them like this in the past.
But what about the mid range and high end?  Yes, you can gain around 3bB each time you double the number of cabs on the high end.  But you'll need to watch out for comb filtering, and lobing.  For small(ish) events, sometimes just pumping up the bass with more cabs can be enough, if you've got good quality tops.


If you are interested in hiring sub-woofers, have a look at my website here: www.soundtruth.co.uk

Wednesday, 6 October 2010

Tuning for your PA System or Sound System

When setting up a PA system it can be a real challenge to 'tune' your set-up to sound right in any given room.  This particularity applies when you're setting up from scratch with new amps, crossovers, speakers that you've not used previously.  Any given speaker will have a different frequency response, different optimal crossover points, and so on.  Different amps will exhibit different amounts of gain.  And of course, different rooms will have modes, surfaces and reflections to consider.
In these cases it's very hard just to use your ears to set up the system.  After a few minutes of listening, ears can 'adjust' to a particular sound, and your system can end up sounding wrong.  If you have no choice, it's best to take a short break and come and listen again.  But there are other tools out there to help.  One of which is the real time analyser, or RTA.
In basic terms, this is a device, or software application, that splits the sound into different wavelengths, and measures their relative intensity.
The application I tend to use is call True RTA.  It can be installed on a laptop for portable use, but is best used with a good quality condenser or measurement microphone, rather than the built in laptop mic.

True RTA real time analyser
Real time analysers can be used in a live setting for fine tuning a system response.  Playing pink noise through the system provides one method of analysis.  Some programs like True RTA also provide a sweep tone, which can give further insight into the frequency response of the system, and also to some extend the room modes.

True RTA in use on an outdoor festival
If you are interested in fine tuning your PA System, whether in the UK, Africa, or US, please don't hesitate to get in touch with me.  I offer Sound System tuning to churches, schools, colleges, and other music venues.


Tuesday, 5 October 2010

KT Tunstall rocks at Thelastfestival 2010

Last week we did the sound for KT Tunstall at Thelastfestival, which was put on by CBS for last.fm.  On front of house we used 4 stacks of HK Audio DEACON, monitoring was done with HK Audio Contour CT112 wedges in bi-amp mode, driven by HK digital field controller.
KT's on stage set-up included a bank of effects pedals, including a Akai E2 Headrush loop pedal, and a Korg Kaoss pad.  Four DI boxes where used for the setup, these where Radial Engineering boxes.


KT Tunstall on stage
Due to the bar being positioned at the back of the venue (London's Village Underground), the mixing desk was positioned at the side, but happily still offered a good view of the stage.  The mixer in question was a Soundcraft GB4 32 channel.  Various outboard was used, including a Mackie Quad comp for lead vocals and guitars.
If you have an event coming up, contact me for PA Hire, Lighting hire or other requirements.